
Configuring Categories from PowerTeacher Pro in Schoology
Before beginning category setup, make sure your PowerSchool server is on a supported version.
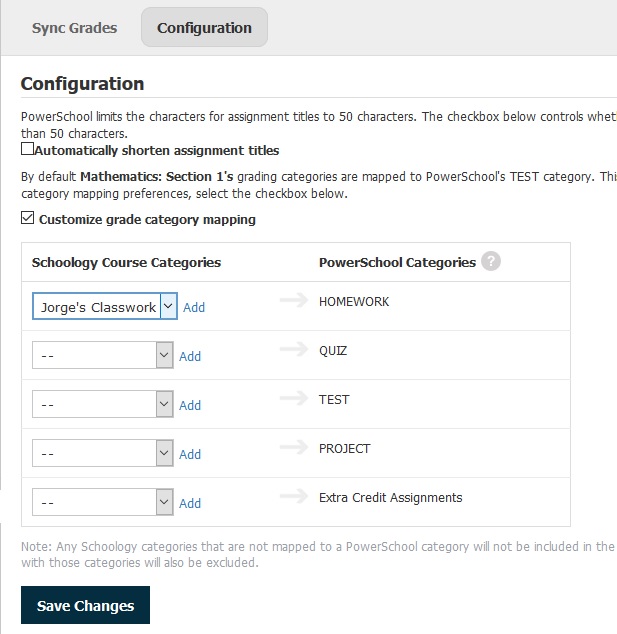
Matching PowerTeacher Pro Categories in Schoology
-
Log in to Schoology.
-
In the top menu, click Courses and select the course from the list. Schoology recommends you choose the same Final Grade Settings scale that you chose in PowerSchool.
-
Click the PowerSchool app from your course and click Configuration.
-
Check the Customize grade category mapping box to display the category mapping table.
-
In the Schoology Course Categories column, choose the correct Schoology Category that you want to map to the equivalent PowerSchool Category in the right column.
-
Click Add next to the drop-down menu and then click Save Changes to add the new mapping.
-
If your sections are linked, you must toggle to the next section in the Configuration tab and map PowerSchool categories to the Schoology categories.
-
Supported custom categories are only those associated with the Lead Teacher in the PowerSchool section.